|
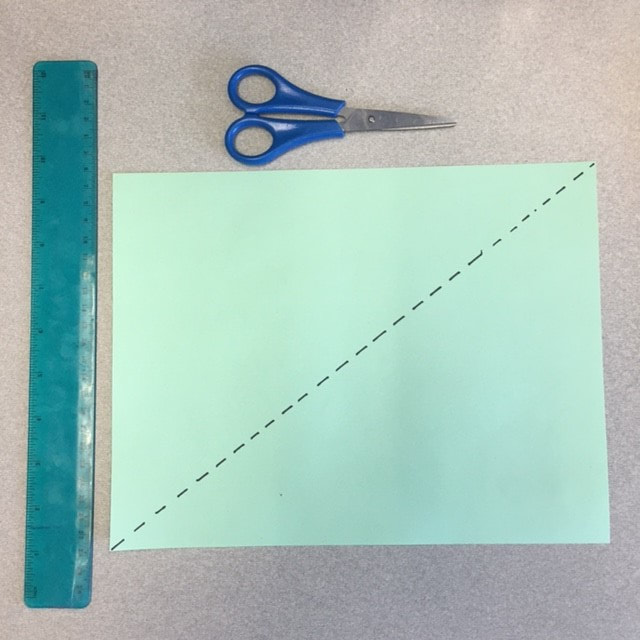
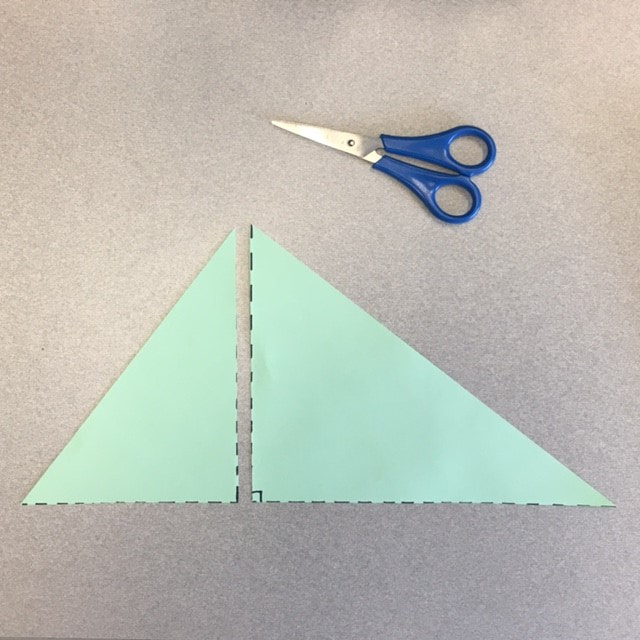
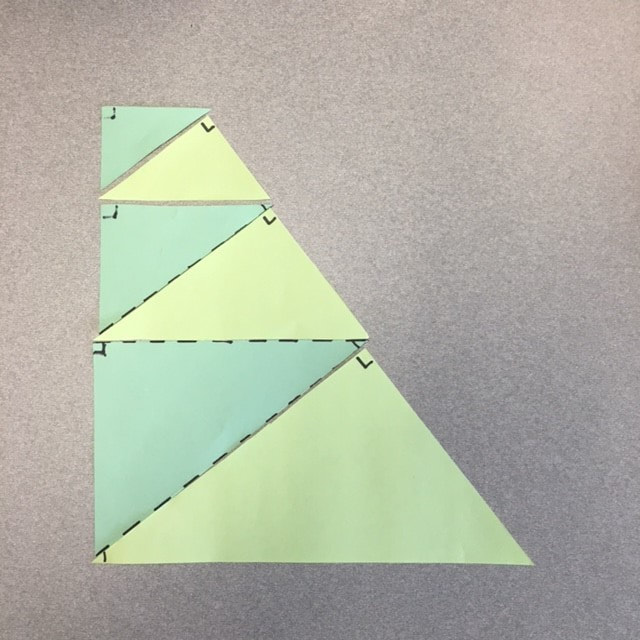
There are lots of ways to introduce the primary trigonometric ratios to students. While brainstorming last week with a few teachers, we decided that this year we'd like to try to introduce it using an art project. This project comes from day 34 of Annie Perkin's #MathArtChallenge series. This "Similar Right Triangle Patterns" project asks students to make a design with similar right triangles that have been cut out of a sheet of paper. Here are some instructions: Step 1 - Cut a sheet of paper in half along its diagonal. Set aside one triangle.
Step 2 - On your right triangle, fold or draw an altitude to the hypotenuse.
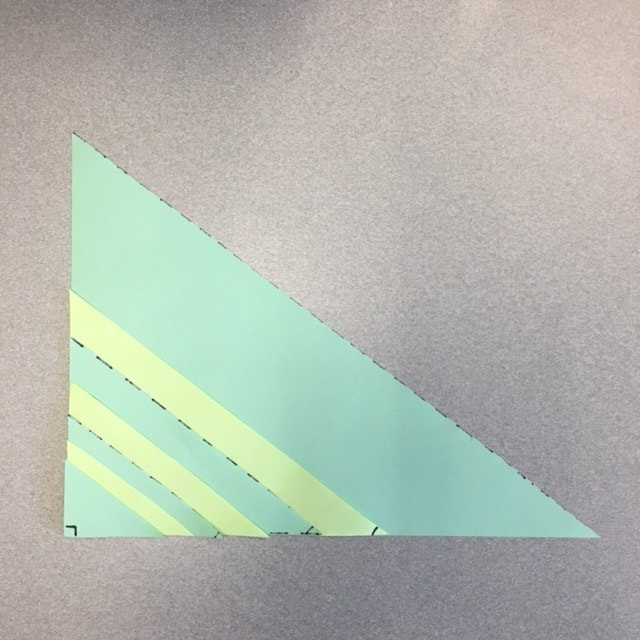
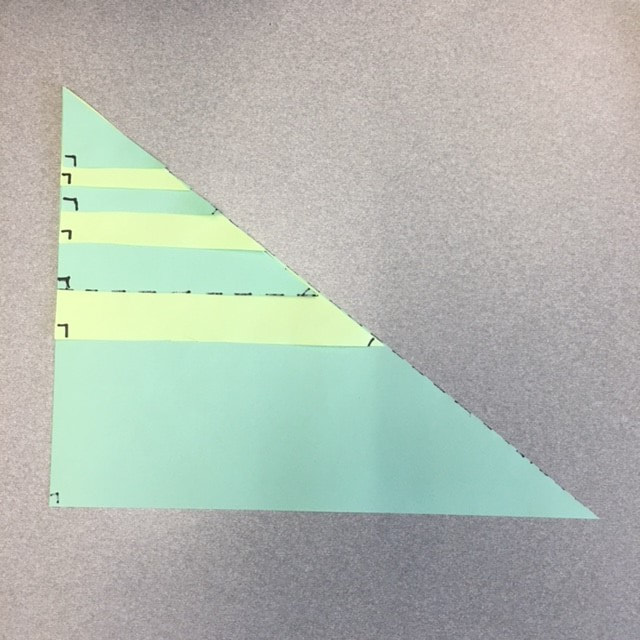
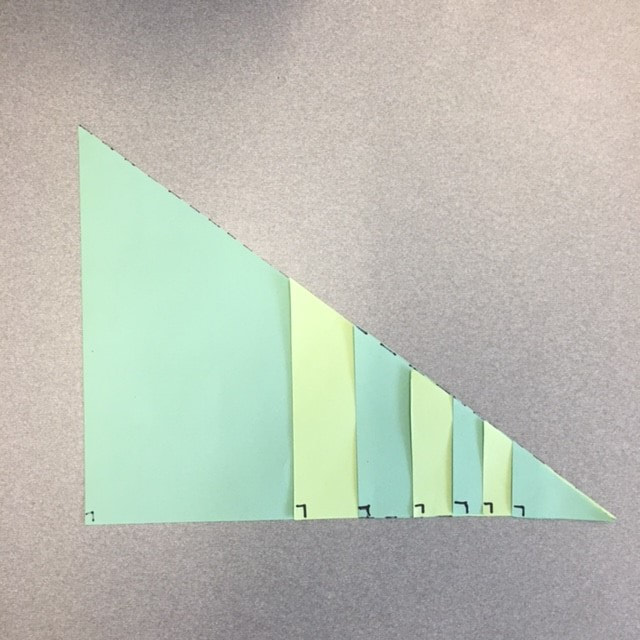
Step 3 - Set aside the smaller right triangle and repeat step 2 with the larger. 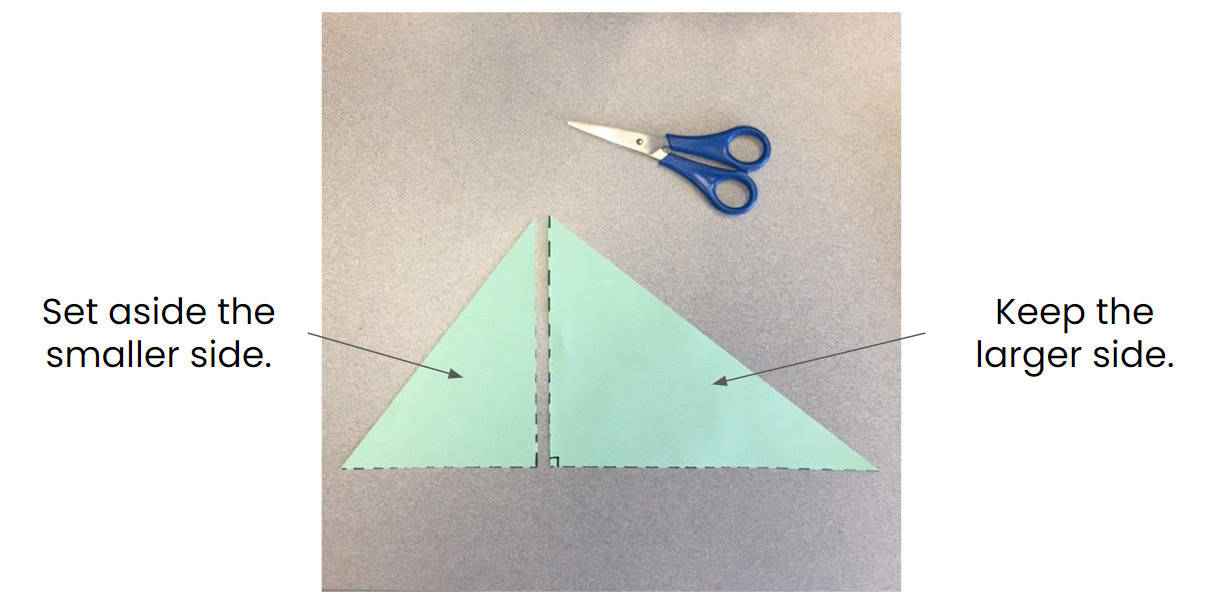 Ask students to continue this process a few times. They can then trade every other sized triangle with a partner that used a different color. Next, ask them what they notice and wonder about their set of triangles. Some students might notice that all the triangles are similar. In other words, they are all different sizes but have the same three angles. Students can prove this to themselves by aligning their triangles at each corresponding vertex.
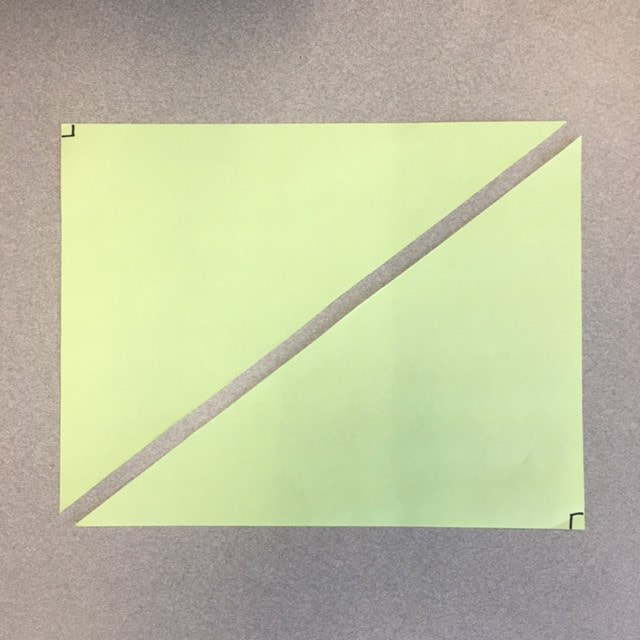
Next, ask students to create an artistic design by arranging their triangles in pattern. There are lots of different interesting ways to do this.
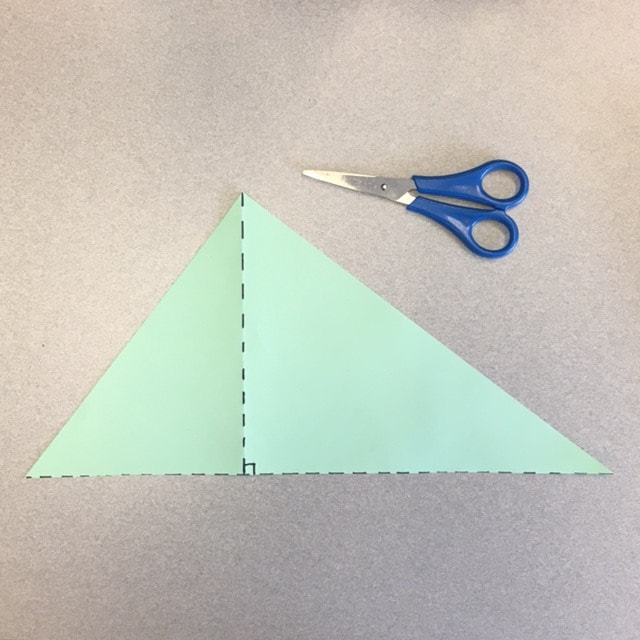
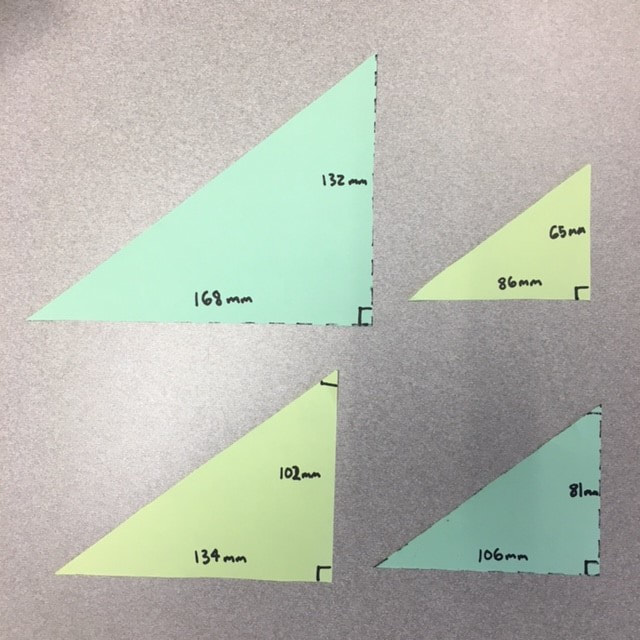
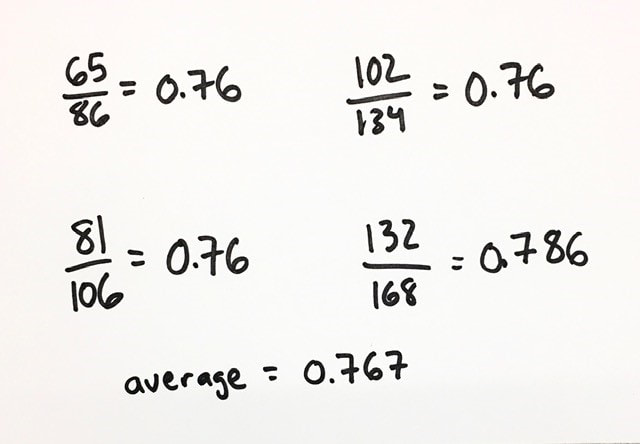
For some cool pattern ideas, check out these from Becky Warren. You could also try arranging triangles using this Mathigon Polypad shared by Mark Kaercher. Discovering RatiosAsk students to take their four largest triangles and measure the length of the two legs (adjacent to the right angle) to the nearest millimetre. Note that each time students fold and cut a triangle, small inaccuracies are introduced so using the largest triangles will give the best results. Ask students to take the smaller side length and divide by the larger side length (this is the same as asking students to find the slope, or "rise over run", of each paper "ramp"). Students will notice that these values are quite close. Ask students to average their four values. They can then compare their average with those from other students. Since all the triangles in the room are similar (assuming we all started with an 8.5"x11" sheet of paper), we should all have similar ratios.
Ask students to measure the angle at the bottom vertex of this triangle. They should get an angle of about 38° (given the diagonal of an 8.5"x11" piece of paper). Ask student if they think this is a special property of 38° right triangles or if all right triangles might have a common ration. Split the class up into groups. Have one group draw right triangles with a 15° angle. Have another group draw right triangles with a 30° angle and a final group draw right triangles with a 45° angle. What do they notice when they compare the ratio of the two legs (smaller side divided by larger side)? At this point you might be ready to introduce the term of tangent as a function that lets you know the ratio of these two sides given any angle. Perhaps they could look up these ratios in a tangent table. There are lots of great suggestions for how to introduce trigonometric functions: Check out this idea from Jo Morgan or this idea about introducing trig through slope from Jon Orr. Where would be your next step in teaching students about the primary trigonometric ratios? Additional explorations? Perhaps a more traditional worksheet to consolidate and reinforce their ideas? Nova Scotia Mathematics Curriculum Outcomes Mathematics 10 M01 - Students will be expected to develop and apply the primary trigonometric ratios (sine, cosine, tangent) to solve problems that involve right triangles. EL
Comments are closed.
|
Categories
All
|

 RSS Feed